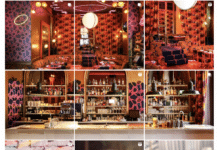
There have been some amazingly creative uses of Facebook’s new profile layout recently:


You can see more cool examples here and here. There are two ways to do this, depending on whether you have Photoshop or not…
WITH PHOTOSHOP
STEP 1: Download this Photoshop PSD file:
STEP 2: Drag a picture of yourself into the canvas and put that layer behind my layer (which is essentially a Facebook screenshot with holes in) which should look like the image above.
STEP 3: Move and resize your image until you’re happy with how it looks.
STEP 4: ‘Save for Web’. Select the ‘JPEG High’ preset. In the following screen where you choose a filename select ‘All User Slices’ in the ‘Slices’ drop-down. Click Save.
STEP 5: You’ll see the 6 images you have saved are named:
- Gallery-Pic-1-(tag-last)
- Gallery-Pic-2
- Gallery-Pic-3
- Gallery-Pic-4
- Gallery-Pic-5-(tag-first)
- Main-Profile-Pic
Upload these to Facebook in a new album
STEP 6: Make ‘Main-Profile-Pic’ your profile pic and then tag yourself in the gallery images to make them appear. IMPORTANT: you must tag yourself in the gallery images in the correct order, starting with the one on the very right, working your way to the one on the left.
STEP 7: Remove any unwanted news feed items from your profile generated whilst creating this. And you’re done!
WITHOUT PHOTOSHOP
For a quick, easy way to do this you can use new service profileheaders.com where you can login using your Facebook credentials and quickly create a snazzy looking profile.
Have fun, and share the fruits of your labour (your Facebook URL) in the comments 🙂
Want to learn new creative and marketing skills with me? Check out upcoming courses on topics like SEO, content marketing, copywriting and podcasting.
What's trending in digital marketing?
Stay on top of the latest news, tips, tools and updates in digital. Just for people in marketing and business. No fluff, no ads, no spam.
Join thousands of readers keeping abreast with it all, every Thursday.


